Imagine building a house where you can add a security system, a smart doorbell, or even a home theater — without calling a contractor. That’s what plugins do for your WordPress website.
Plugins are like apps for your site. They let you extend functionality, add new features, and customize your website — no coding required. Whether you want to improve SEO, create contact forms, speed up performance, or build an online store, there’s a plugin for that (actually, there are dozens!).
And the best part? You don’t need to be a developer to use them. With just a few clicks, you can install, activate, and configure powerful tools that transform your WordPress site into a customized digital powerhouse.
This guide is your friendly roadmap to getting started with WordPress plugins. We’ll walk you through:
- ✅ What plugins are and how they work
- 🛠️ How to install and configure them the right way
- 🚀 Tips, best practices, and troubleshooting advice
Whether you’re a total beginner or just looking to sharpen your WordPress skills, this step-by-step guide will help you take full control of your site’s capabilities — safely and confidently.
💡 Quick Fact: As of today, the WordPress Plugin Directory features over 60,000 free plugins. That’s a lot of power at your fingertips!
🔍 What Are WordPress Plugins?
At their core, WordPress plugins are small software add-ons that plug into your WordPress site to add or extend functionality. Think of them as little power-ups — each one giving your website a new superpower.
Need an image slider? Want to improve your SEO? Looking to build a contact form, secure your site, or create a multilingual experience?
There’s likely a plugin — or ten — for just about anything you want to do on your site.
🛍️ Real-World Plugin Examples
- Yoast SEO – Optimize your content for search engines
- Contact Form 7 – Create forms with ease
- WooCommerce – Turn your site into a fully functional online store
- Wordfence – Add powerful security and firewall protection
- UpdraftPlus – Back up your site automatically
🌐 WordPress.org vs WordPress.com — Plugin Access
If you’re using WordPress.org (self-hosted), you have full access to install any plugins you want. However, WordPress.com users need a Business plan or higher to use third-party plugins.
Knowing the difference can save you a lot of confusion early on!
🔎 Where to Find WordPress Plugins
So now you know what plugins are — but where exactly do you get them? 🤔
There are two main places where WordPress users can find and download plugins, each with its own level of safety, support, and features. Let’s break them down:
1️⃣ The Official WordPress Plugin Directory (Best for Most Users)
This is the built-in marketplace that’s accessible right from your WordPress dashboard. It’s free, community-driven, and every plugin listed here must meet strict guidelines.
- ✅ Completely free to use
- 🔍 Searchable by name, function, or developer
- 🧑💻 Thousands of vetted, open-source plugins
- 💬 Reviews, active installs, last updated info all visible
To install from here, just go to Plugins → Add New inside your dashboard and start browsing!
2️⃣ Premium Plugin Marketplaces
Sometimes free just doesn’t cut it — and that’s where premium plugins shine. These plugins often come with enhanced features, dedicated support, and regular updates.
- CodeCanyon – A massive marketplace for premium plugins from developers around the world
- Independent developer sites – Like Gravity Forms, WP Rocket, or MemberPress
💡 Tip 1: Many plugins follow the “freemium” model — offering a basic free version with paid upgrades for advanced features.
💡 Tip 2: Always check licensing, support terms, and refund policies before purchasing a premium plugin.
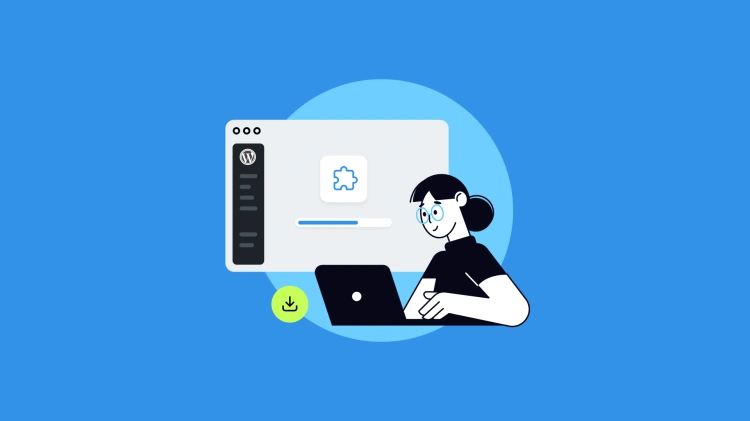
⚙️ How to Install a Plugin (3 Easy Methods)
Installing a WordPress plugin is incredibly simple — and there’s more than one way to do it. Whether you’re a beginner or a more advanced user, you’ll find a method that works for you.
Let’s walk through the three most common ways to install a plugin on your site.
🧭 Method 1: Installing from the WordPress Dashboard (Most Common)
- Log in to your WordPress Admin Dashboard
- Go to Plugins → Add New
- Use the search bar to find the plugin you want
- Click Install Now → then Activate
That’s it! You’ve added new functionality to your site in under 60 seconds.
💡 Pro Tip: Always check the plugin’s last update date, rating, and compatibility before installing.
📦 Method 2: Uploading a Plugin via .zip File
This method is used when you’ve downloaded a plugin from a third-party source (like CodeCanyon or a developer’s website).
- Download the plugin’s
.zipfile to your computer - Go to Plugins → Add New → Upload Plugin
- Click Choose File → Select the
.zip - Click Install Now → then Activate
This is especially useful for premium or custom-built plugins.
🔧 Method 3: Installing via FTP (Advanced)
For developers or users with FTP access, this method allows you to upload plugins directly to the server.
- Unzip the plugin folder on your computer
- Connect to your site using an FTP client (like FileZilla)
- Navigate to
/wp-content/plugins/ - Upload the unzipped plugin folder
- Go back to the WordPress dashboard → Plugins
- Click Activate under the new plugin
This is helpful if your dashboard upload is failing or you need to fix a broken plugin manually.
🔐 Stay Safe When Installing Plugins
- ✔️ Only install from trusted sources (WordPress.org or reputable developers)
- 🛡️ Check user reviews and active installs
- 🔍 Keep an eye out for warnings about outdated plugins
Plugins are powerful tools, but every install should be a thoughtful decision. A bad plugin can slow down your site or even introduce security vulnerabilities.
🔄 Activating and Deactivating Plugins
Installing a plugin is just the first step — to make it work, you need to activate it. And sometimes, you’ll need to deactivate a plugin to troubleshoot or remove it.
✅ How to Activate a Plugin
- After installation, click the Activate button (you’ll see this immediately after installing a plugin).
- Or, go to Plugins → Installed Plugins.
- Find the plugin in the list and click Activate.
Once activated, the plugin will be live and its features will become available (e.g., new menus, widgets, or settings areas).
⛔ How to Deactivate a Plugin
- Go to Plugins → Installed Plugins
- Find the active plugin
- Click Deactivate
This turns the plugin off without removing it from your site. It’s perfect for debugging or temporarily disabling features.
💡 Tip: Deactivating a plugin doesn’t delete your settings or data in most cases — you can reactivate it later with everything intact.
🧹 When to Deactivate or Delete a Plugin
- 🚧 When troubleshooting site issues (e.g., plugin conflicts)
- 🛠️ When switching to a different plugin with overlapping features
- 🧽 To clean up your site and improve performance
Note: Too many active plugins can slow down your site. It’s a good idea to periodically review and deactivate what you’re not actively using.
❓ What Happens in the Background?
When you activate a plugin, WordPress loads its code into the site’s functionality. Deactivating a plugin simply stops it from running — but doesn’t erase anything unless you delete it.
Some plugins also include a “Setup Wizard” after activation, especially premium or complex ones. Always follow those to ensure proper configuration.
🛠️ How to Configure Plugin Settings
Once a plugin is activated, the real magic begins — but not before you configure it. Every plugin is different, but they generally include a settings page where you can customize how it works on your site.
🔍 Finding the Plugin’s Settings Page
Depending on the plugin, settings may appear in different areas of the dashboard:
- Under the “Settings” menu (e.g., Settings → Plugin Name)
- As a top-level menu item (especially for large plugins like WooCommerce or Elementor)
- Inside Tools or Appearance (e.g., widget-based plugins)
After activation, most plugins will either auto-redirect you to their settings page or display a notification banner with a setup link.
🧙♂️ Setup Wizards
Many modern plugins offer a guided setup wizard after activation — especially premium or complex plugins like SEO tools, membership plugins, or security suites.
- ✅ Makes setup easier for beginners
- ⚙️ Allows you to configure essential settings upfront
- 🎯 Ensures you don’t miss important features
💡 Pro Tip: If the plugin doesn’t take you to a settings page automatically, check the plugin’s documentation or look for a new menu item in the dashboard.
⚠️ What to Look Out for When Configuring Plugins
- 🔐 Security plugins may ask for API keys or email verification
- 🧰 Caching plugins require fine-tuning to avoid breaking layouts
- 📩 Contact form plugins may need email delivery settings configured
- 💬 Translation or SEO plugins might require a basic walkthrough first
It’s always a good idea to read the plugin’s documentation or help guides if you’re unsure. You’ll often find tips for optimal performance and common pitfalls to avoid.
🔁 Can You Reconfigure Later?
Absolutely. You can go back to the plugin’s settings page at any time to tweak, adjust, or reset your preferences.
🧠 Best Practices for Managing Plugins
With great power comes great responsibility — and plugins are no exception. While they can transform your site, poorly managed plugins can cause performance slowdowns, conflicts, and security vulnerabilities.
Here are some tried-and-true best practices to keep your WordPress plugin game sharp:
🔄 Keep Plugins Updated
- 🛠️ Developers release updates to patch bugs, fix vulnerabilities, and improve performance.
- 📆 Check for updates regularly via Dashboard → Updates or Plugins → Installed Plugins.
- ⏰ Consider enabling auto-updates for plugins you trust to keep things running smoothly.
💡 Tip: Always back up your site before running plugin updates, especially for major releases.
🚫 Avoid Plugin Overload
- 🔗 Every active plugin adds load time and processing demands to your site.
- ⚔️ Too many plugins can cause conflicts — especially if they overlap in functionality.
- 🧹 If you’re not using a plugin, deactivate or delete it to streamline your site.
✅ Choose Quality Over Quantity
- ⭐ Look for plugins with strong ratings, recent updates, and lots of active installs.
- 🧑💻 Well-documented plugins are easier to configure and troubleshoot.
- 🛡️ Choose plugins that follow WordPress coding standards and best practices.
🔐 Mind Plugin Security
- 🕵️♂️ Only install from trusted sources (WordPress.org, reputable developers, premium marketplaces).
- 🧯 Avoid “nulled” plugins — they often contain malware or backdoors.
- 🔐 Use a security plugin (like Wordfence or Sucuri) to monitor vulnerabilities.
🔁 Periodic Plugin Reviews
Make it a habit to review your plugins every few months:
- Do you still use all of them?
- Are any outdated or unmaintained?
- Could two plugins be replaced by one more efficient one?
This kind of plugin housekeeping ensures your site stays fast, secure, and clutter-free.
🎉 Wrapping Up: Mastering WordPress Plugins
Plugins are the heart of WordPress customization. They’re what turn a basic site into an online store, a photography portfolio, a membership community — or anything else you can imagine.
In this guide, we’ve covered everything you need to confidently install, activate, configure, and manage WordPress plugins. Here’s a quick recap:
- 🔧 Installing Plugins: Use the dashboard, upload a .zip file, or go the FTP route.
- 🟢 Activating & Deactivating: Turn features on or off safely from your admin panel.
- ⚙️ Configuration: Tweak settings to fit your needs, often with helpful setup wizards.
- 🛡️ Best Practices: Update regularly, avoid bloat, choose wisely, and prioritize security.
Now that you’re plugin-savvy, your WordPress site has no limits. Whether you want to improve SEO, add booking forms, enhance performance, or create a newsletter — there’s (almost) always a plugin for that. If there is none, create you own plugin from scratch.
✨ Final Tip: Always test new plugins on a staging site if possible — and don’t forget to back up before making big changes!
Happy customizing! 🚀