Launching your own online store with WordPress and WooCommerce is exciting — but let’s be honest, the first time you add a product can feel a little overwhelming. What’s the difference between a simple and variable product? What do you do with SKUs and attributes? And how do you make sure your product looks amazing on the front-end?
Whether you’re setting up a small handmade shop, a growing brand, or a full-scale eCommerce business, this guide will walk you through everything you need to know to confidently add products to WooCommerce — step by step, and without the jargon.
💡 Good to know: WooCommerce powers over 30% of all online stores globally. Its flexibility and scalability are a huge reason why entrepreneurs of all kinds choose it as their digital storefront.
In this guide, you’ll learn how to:
- ⚙️ Set up the basics for WooCommerce product creation
- 🛒 Add new products with descriptions, pricing, and images
- 🎨 Organize your products using categories, tags, and attributes
- 📦 Manage inventory, stock levels, and shipping info
- 📈 Optimize your listings to boost conversions and SEO
Let’s get your first product live and looking fantastic — without the stress!
⚙️ Prerequisites Before You Start
Before diving into product creation, it’s important to make sure your WooCommerce setup is fully ready. This helps prevent errors and ensures a smooth experience when building out your product catalog.
📦 1. Install & Activate WooCommerce
First things first — make sure WooCommerce is installed and activated on your WordPress site. If you haven’t already:
- Go to Plugins → Add New
- Search for “WooCommerce”
- Click Install Now and then Activate
Once activated, WooCommerce will launch a setup wizard to help configure basic store settings. It’s quick and easy, and you can always adjust settings later.
💰 2. Set Up Your Store Basics
Go to WooCommerce → Settings and review the core options:
- General: Set your store’s address and selling location
- Currency: Choose your default currency (USD, EUR, etc.)
- Payments: Enable payment gateways like PayPal, Stripe, or bank transfer
- Shipping: Configure zones, rates, and shipping methods
- Tax: Turn on tax calculations if needed
💡 Pro Tip: Even if you’re not ready to launch, it’s good to get these core settings right early on — they affect how your products behave later.
🧠 3. Understand Product Types
WooCommerce supports several types of products. Knowing the difference helps you choose the right one from the start:
- Simple Product: One item with no variations (e.g., a book, mug)
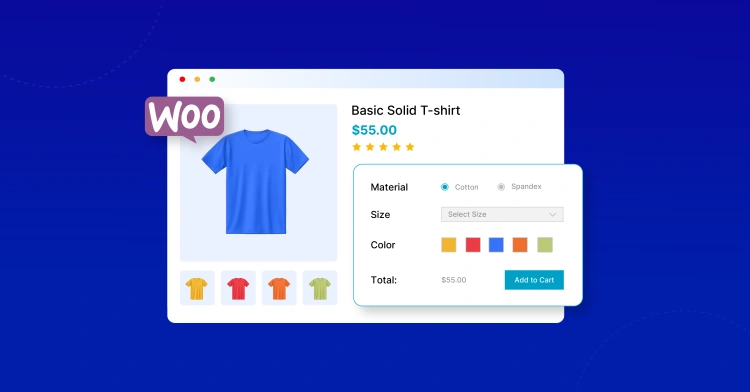
- Variable Product: One product with different versions (e.g., T-shirt with size & color options)
- Grouped Product: A collection of related simple products
- Downloadable Product: A digital file like an eBook or software
- Virtual Product: A service with no shipping (e.g., consultation)
Don’t worry — we’ll cover how to add each type in this guide. For now, just be aware of your options.
➕ Adding a New Product in WooCommerce (Step-by-Step)
Now that WooCommerce is installed and your store settings are ready, let’s walk through how to create a product from scratch. Don’t worry — we’ll go slowly and explain every key option so you feel confident hitting “Publish”.
🔍 Step 1: Go to Add New Product
From your WordPress dashboard, head to Products → Add New. This will open the product editor screen where all the magic happens.
📝 Step 2: Add Product Title and Description
- Product Name: This is the main title that customers will see. Keep it clear and descriptive (e.g., “Organic Cotton T-Shirt – Unisex”).
- Main Description: Use the large text editor to write a detailed description. Tell a story, highlight benefits, list specs — whatever your customer needs to make a buying decision.
🖼️ Step 3: Upload Product Images
- Product Image: This is the main image — make it high-quality, well-lit, and ideally square (e.g., 1000x1000px).
- Product Gallery: Upload multiple images here to show the product from different angles, or in use.
📸 Pro Tip: Use lifestyle shots, zoom-in details, or product-in-action photos to increase trust and conversion rates.
🏷️ Step 4: Choose Product Type
In the “Product Data” box, select your product type. For now, start with Simple product. Check the boxes for Virtual or Downloadable if applicable.
💵 Step 5: Set Price, SKU, and Inventory
- Regular Price: Your main product price
- Sale Price: (Optional) Discounted price (can even be scheduled!)
- SKU: A unique identifier for stock-keeping — handy if you have many products
- Inventory: Manage stock status, quantity, and backorder rules
🚚 Step 6: Shipping Details (for Physical Products)
- Weight & dimensions — helps calculate accurate shipping rates
- Shipping class — useful if you have different rates for heavy or bulky items
🔍 Step 7: Add a Short Description
This appears near the “Add to Cart” button on the product page. Think of it as a sales blurb — highlight the top benefit in a couple of lines.
📌 Step 8: Publish Your Product
Once everything looks good, hit Preview to double-check the layout. Then click Publish — and your product is live!
🏷️ Product Categories, Tags & Attributes
Once your product content is in place, it’s time to organize it. Think of this step like shelving products in a physical store — it helps customers find what they’re looking for faster and improves your store’s structure and SEO.
🗂️ Product Categories
Categories are like the main “aisles” of your store. Use them to group similar products together.
- Example: If you’re selling apparel, categories might include “T-Shirts”, “Hoodies”, or “Accessories”.
- You can also create sub-categories (e.g., “T-Shirts → Graphic Tees”)
- Each product should belong to at least one category
📌 Tip: Avoid over-categorization — keep it simple and logical. Think like your customer!
🏷️ Product Tags
Tags are more flexible than categories. Use them for details that might cut across multiple categories.
- Example: Tags like “eco-friendly”, “limited edition”, or “made in USA” can be used on many product types
- Tags help with internal search and product discovery
- They’re also great for dynamic product filtering
🎨 Product Attributes
Attributes are key to adding filters and enabling product variations (which we’ll cover next). You define attributes in advance, and then assign them to products.
- Global Attributes: Shared across multiple products (like “Size” or “Color”)
- Custom Attributes: Created on-the-fly for one product only
- Customers can filter by attributes in the shop sidebar if your theme or plugin supports it
✨ Example Use Case:
If you sell shoes, attributes like Size (6, 7, 8, 9…) and Color (Black, White, Red) will help customers narrow down their choices — and allow you to offer variations.
🧪 Creating Variable Products (Sizes, Colors, etc.)
Not every product comes in “one-size-fits-all”. If you sell items like clothing, shoes, or anything with variations (like sizes or colors), then you’ll want to use variable products in WooCommerce.
Unlike simple products, variable products let customers choose options before adding to cart — improving the shopping experience and minimizing confusion.
🎯 Step 1: Create or Select Attributes
Go to Products → Attributes and create global attributes like Color and Size if you haven’t already. Then assign the relevant terms (e.g., Red, Blue, Small, Medium).
- Name: e.g., “Size”
- Slug: e.g., “size”
- Terms: S, M, L, XL
🧰 Step 2: Create a New Product (or Edit Existing)
In the Product Data section, change the type from Simple product to Variable product.
🧩 Step 3: Assign Attributes to the Product
Click the Attributes tab and add the ones you created earlier. Make sure to check “Used for variations”.
⚙️ Step 4: Create Variations
Now go to the Variations tab and click “Add variation”. You can manually create combinations, or select “Create variations from all attributes”.
For each variation, you can set:
- Individual price
- Optional SKU
- Stock levels
- Image (helpful for visual differences)
- Shipping details (if different)
📦 Example: A hoodie available in S, M, L sizes and 3 colors would generate 9 variations automatically.
👁️ Step 5: Preview & Publish
Use the preview button to make sure the dropdowns and variation selections work properly. Once satisfied, hit Publish — your variable product is now live!
📦 Inventory, Shipping & Advanced Options
Once your basic product info and variations are set, it’s time to handle the behind-the-scenes mechanics — the things that keep your store running smoothly and prevent overselling or shipping issues.
📊 Inventory Management
Under the Inventory tab in the Product Data panel, you’ll find WooCommerce’s built-in tools to control stock levels.
- SKU: A unique product ID (Stock Keeping Unit) — useful for internal tracking.
- Stock Management: Toggle this on to enter quantity and enable automatic stock reduction on orders.
- Stock Status: Choose between “In stock”, “Out of stock”, or “On backorder”.
- Sold Individually: Limits the product to one per order (ideal for rare or limited items).
🧮 Tip: If you’re selling physical goods, turn on stock management. If you’re selling digital or made-to-order items, you may not need it.
🚚 Shipping Options
For physical products, click on the Shipping tab to define how your product is delivered.
- Weight & Dimensions: Used to calculate shipping costs if you use weight-based rules or live rates (e.g., USPS, FedEx).
- Shipping Class: Organizes products into groups with similar shipping needs (e.g., “Heavy”, “Light”, “Free Shipping Eligible”).
If you’re using a plugin like WooCommerce Shipping or a real-time carrier integration, this information becomes even more critical for accuracy.
⚙️ Advanced Options
The Advanced tab lets you fine-tune product-level behavior:
- Purchase Note: A message sent to the buyer after purchase (useful for special instructions or thank-yous).
- Menu Order: Controls the sort order of products in categories (lower number = higher up).
- Enable Reviews: Decide whether customers can leave product reviews.
🎯 Optimizing Product Pages for Better Sales
Think of your product page as your best salesperson. It should answer customer questions, remove doubts, and drive them toward the “Add to Cart” button with confidence.
🖼️ Use High-Quality Images
- Upload crisp, well-lit photos — minimum 1000px on the longest side.
- Include multiple angles, close-ups, and lifestyle shots.
- Use the Product Gallery to create a scrollable image experience.
📸 Tip: People can’t touch or try your product online — your images need to do the convincing!
🧠 Write a Compelling Product Description
Your long description should do more than list features. Use storytelling, benefits-focused copy, and formatting to make it scannable.
- Highlight benefits over features
- Use headings, bullets, and short paragraphs
- Add trust signals like warranties, guarantees, or eco-certifications
💬 Use an Effective Short Description
This is the snippet near the “Add to Cart” button — make it count!
- Focus on key benefits and unique selling points
- Keep it under 2–3 sentences
🌟 Enable and Encourage Reviews
Social proof matters. Make sure reviews are enabled in your product settings and encourage customers to leave them.
- Offer incentives like discount codes for reviews
- Display review ratings prominently on product and shop pages
🔗 Add Related Products and Cross-Sells
Use the Linked Products section to boost your average order value.
- Upsells: Better or more expensive versions of the current product
- Cross-sells: Complementary products (e.g., batteries for a flashlight)
📱 Make It Mobile-Friendly
Most shoppers browse on their phones. Use a responsive theme and preview your product page on multiple devices to ensure everything loads smoothly.
📈 Final Checklist Before Publishing Your Store
Before hitting the “Launch” button, take a few moments to run through this checklist. These last-minute checks will ensure your store works smoothly, looks professional, and delivers a seamless experience for your customers.
🔍 Review All Product Details
- Product titles and short descriptions are clear and compelling
- Prices and SKUs are accurate
- Stock levels are correct
- Variations work as expected (test all combinations!)
- Descriptions and excerpts are well-formatted and typo-free
🖼️ Double-Check Media
- Main image and gallery images are high quality
- Alt text is used for SEO and accessibility
- Thumbnails and previews look good on all devices
🚚 Confirm Shipping & Inventory Settings
- Shipping classes are assigned correctly
- Product weight and dimensions are set (if applicable)
- Stock management rules are properly configured
💳 Test the Purchase Flow
- Add products to cart and proceed through checkout
- Test multiple payment methods
- Confirm order emails are sent correctly
- Download or fulfillment process works for digital or physical items
📱 Mobile Responsiveness
- Product pages look great on phones and tablets
- Buttons and menus are clickable and accessible
- Cart and checkout process is smooth on smaller screens
🌐 SEO & Performance
- URLs are clean and keyword-optimized
- Product meta titles and descriptions are set (use an SEO plugin)
- Page speed is optimized (use caching, CDN, compress images)
- Submit to Google Search Console
📢 Marketing Touchpoints
- Add social sharing buttons on product pages
- Connect to email marketing platforms (e.g., Mailchimp, Klaviyo)
- Set up Facebook Pixel or Google Analytics
🛠️ Pro Tip: Install the WooCommerce Status page plugin or use WooCommerce Tools to keep an eye on your store’s health post-launch.
🚀 You’re Ready to Launch!
With everything checked and tested, it’s time to go live. Hit that publish button, start marketing your store, and get ready to welcome your first customers!
And remember — optimization doesn’t stop at launch. Keep testing, iterating, and improving over time based on analytics and customer feedback.