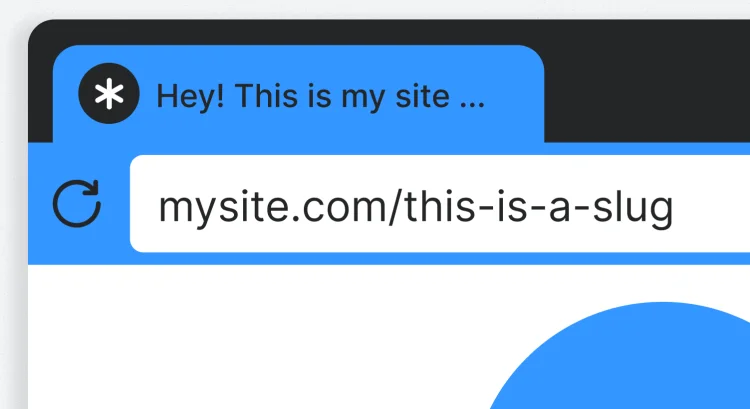
If you’ve ever created a post or page in WordPress, you’ve probably seen a strange-looking little piece of text added to your URL — something like /what-is-a-slug. That little snippet? It’s called a slug.
While the name might sound like a creature from your garden 🐌, in the world of WordPress, slugs are short, human-readable identifiers that help structure your site’s URLs. And they play a surprisingly big role in search engine optimization (SEO), user experience, and how professional your site looks.
In this guide, we’re going to demystify WordPress slugs by answering questions like:
- 🔍 What exactly is a slug?
- 📍 Where do slugs show up on your website?
- 🛠️ How can you edit them (without breaking things)?
- 📈 Why do they matter for SEO?
- ✅ What are best practices for writing slugs?
By the end, you’ll not only know what a slug is — you’ll know how to optimize it like a pro.
💡 Quick Analogy: Think of a slug as a street name in your website’s address. It helps people — and search engines — know where they’re going.
Let’s dive in and start with the basics 👇
🔤 What Exactly Is a Slug in WordPress?
In WordPress, a slug is the part of a URL that identifies a specific page or post on your website in a readable way.
It usually comes right after your domain and any parent folders. For example:
https://yourwebsite.com/about-usIn this case, about-us is the slug.
📚 A More Technical Definition
Technically speaking, a slug is a URL-friendly version of the post or page title. WordPress generates it automatically when you create content — by converting spaces into hyphens, removing special characters, and making everything lowercase.
✅ Good vs. Bad Slug Examples
| Good Slug | Bad Slug |
|---|---|
| how-to-start-a-blog | howtostartablog2022version |
| contact | Contact%20Us |
| wordpress-seo-guide | postid=987 |
Good slugs are short, readable, and keyword-rich. Bad slugs are often long, messy, or filled with unnecessary numbers and characters.
🔍 Pro Tip: A clean slug isn’t just nice to look at — it improves click-through rates in search results and gives users confidence in your content.
🧩 Where Are Slugs Used in WordPress?
Slugs aren’t just for blog posts — they show up all over your WordPress site. Understanding where and how they’re used can help you manage your site’s URLs like a pro.
📝 1. Posts & Pages
This is the most common place you’ll encounter slugs. Every time you create a post or page, WordPress auto-generates a slug based on the title:
https://yoursite.com/how-to-make-sourdoughYou can (and often should) edit this slug to make it cleaner or more keyword-rich.
🏷️ 2. Categories & Tags
When you create a new category or tag, WordPress assigns it a slug. These slugs appear in the URL when someone browses that category:
https://yoursite.com/category/recipeshttps://yoursite.com/tag/gluten-freeYou can customize these slugs under Posts > Categories or Posts > Tags.
📦 3. Custom Post Types (Like Products or Events)
If your site uses custom post types (e.g., for products, events, portfolios), each one also gets its own slug:
https://yoursite.com/product/leather-walletDevelopers can also define the base slug (like /product/) when registering the post type.
🔗 4. Author Archives, Search, and More
- 👤 Author Slugs:
/author/jane-doe - 🔍 Search Slugs:
/search/wordpress+themes - 🕓 Date Archives:
/2024/05/
While you may not always edit these manually, they’re still based on slugs under the hood.
🧠 Pro Tip: If you want full control over slugs across your site, consider using a permalink management plugin or custom post type UI.
🛠️ How to Edit a Slug (Step-by-Step)
WordPress makes it easy to customize slugs — whether you’re working on a blog post, a static page, or even a product listing. Here’s how to do it using different methods.
✏️ Editing a Slug in the Block Editor (Gutenberg)
- Create or open a post/page in the editor.
- Click on the title block — WordPress will auto-generate a slug from your title.
- Look on the right sidebar under the “Permalink” tab.
- Edit the slug directly in the field labeled “URL Slug”.
- Click Update or Publish to save the change.
🧭 Editing a Slug in the Classic Editor
Still using the Classic Editor? No problem:
- Open a post or page.
- Right below the title, you’ll see the permalink with an “Edit” button next to it.
- Click “Edit”, type your new slug, and hit “OK”.
- Update or publish your content.
⚡ Quick Edit from the Posts/Page List
- Go to Posts or Pages in your WordPress dashboard.
- Hover over the post you want to change and click Quick Edit.
- You’ll see a Slug field — modify it and click Update.
📦 Editing Slugs for Categories & Tags
- Go to Posts > Categories or Tags.
- Hover over the item you want to edit and click Edit.
- Change the slug field, then click Update.
⚠️ Important: If the content is already published and ranking on Google, changing the slug can cause broken links. We’ll talk more about redirects in an upcoming section.
📈 Why Slugs Are Important for SEO & UX
Slugs are more than just technical details — they play a big role in how search engines interpret your content and how users experience your website.
🔎 SEO (Search Engine Optimization)
- Keywords in the slug can boost visibility: Including your focus keyword in the slug helps search engines understand what your page is about.
- Short slugs rank better: Long, cluttered URLs tend to perform worse. Clean slugs keep URLs concise and focused.
- Readable slugs get more clicks: People are more likely to click a URL they trust — and slugs that make sense build trust.
Example:
Bad: https://yourwebsite.com/?p=7324
Good: https://yourwebsite.com/wordpress-speed-optimization🧑💻 User Experience (UX)
- Predictability: Visitors can guess what the page is about just by reading the URL.
- Memorability: Clean slugs are easier to remember and type out.
- Sharability: Short and clear URLs are easier to share on social media and messaging apps.
📌 Real Talk: Whether someone finds you on Google or clicks a link in an email, that little slug is often the first impression of your content. Make it count!
✍️ Best Practices for Writing Slugs
Crafting a slug isn’t just about making something URL-friendly — it’s about making it meaningful, readable, and optimized for both people and search engines.
✅ 1. Keep It Short & Simple
The ideal slug is concise — just a few words that clearly describe the content. Avoid unnecessary words like “and,” “the,” “of,” etc.
Good: /wordpress-seo-tips
Bad: /a-collection-of-wordpress-seo-tips-and-strategies
🔑 2. Include Target Keywords
Use relevant keywords that match what your audience is searching for. This gives search engines strong signals about your content’s topic.
📉 3. Avoid Stop Words (Unless Necessary)
Words like “the,” “of,” and “is” often add little value in slugs. Drop them if the meaning is still clear — but keep them if removing changes context.
➖ 4. Use Hyphens (Not Underscores or Spaces)
Google recommends using hyphens (-) to separate words in URLs. Avoid using underscores (_) or camelCase formatting.
🧹 5. Make It Lowercase
WordPress will lowercase your slug by default. Stick with this — URLs are case-sensitive in some environments.
🚫 6. Don’t Repeat Words
Redundant slugs look spammy and don’t add value. Keep it clean.
Bad: /seo-seo-tips-search-seo💡 Quick Tip: When in doubt, ask: “Would this slug make sense to someone who’s never visited my site before?”
⚠️ Caution: Changing Slugs After Publishing
It might seem harmless to tweak a slug after a post goes live, but doing so without precautions can lead to serious issues. Here’s why you need to tread carefully — and how to do it right.
🚧 What Can Go Wrong?
- 🧨 Broken Links: Any links to the original URL — from other websites, emails, or social media — will now lead to a 404 error unless redirected.
- 📉 Lost SEO Juice: Google indexes your content under a specific URL. Change that URL, and you risk losing ranking unless a redirect is in place.
- 😕 Confused Users: Returning visitors may hit an error page if they try to revisit a previously shared link.
✅ How to Change a Slug Safely
If you absolutely need to change a slug, follow these steps:
- Edit the slug using one of the methods described earlier.
- Set up a 301 redirect from the old URL to the new one.
- Test the old URL in your browser to ensure it redirects properly.
Recommended plugin: Use the free Redirection plugin to easily manage redirects in WordPress.
📌 Best Practice: Only change slugs if absolutely necessary — such as for clarity, rebranding, or correcting major errors. Always redirect the old slug!
🧠 Wrap-Up: Slugs Are Small but Mighty
At first glance, slugs might seem like a technical detail you can ignore — but as we’ve explored, they’re actually key players in SEO, user experience, and content organization.
With just a few thoughtful tweaks, your slugs can:
- ✔️ Improve search engine rankings
- ✔️ Make your URLs more readable and memorable
- ✔️ Enhance the professionalism and trustworthiness of your website
- ✔️ Prevent broken links and confusion when handled properly
Whether you’re launching a new blog, updating an online store, or optimizing an existing website, managing your slugs is one of those “small changes” that can lead to big results.
💬 Final Thought: Think of slugs as the punctuation of your web address. When done right, they keep everything clean, clear, and impactful.
If you found this guide helpful, consider bookmarking it or sharing it with fellow WordPress users. And remember — it’s the little things that make a big difference!