If you’ve ever held your breath while clicking the “Update Plugin” button, you’re not alone. Updating your WordPress site, trying new plugins, or tweaking your theme can feel like defusing a digital bomb — one wrong move, and boom: white screen of death, broken layout, or a site that’s suddenly gone rogue.
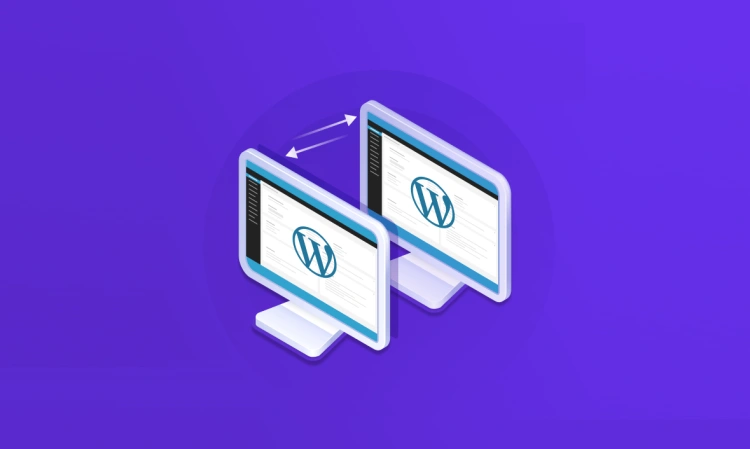
That’s where a staging site comes in. It’s like a digital sandbox — a private, controlled environment where you can safely test changes before unleashing them on your live site.
Think of it like a dress rehearsal for your website. You get to test everything — updates, redesigns, new features — without an audience watching (or anything breaking in public).
Whether you’re a beginner, blogger, developer, or business owner, using a staging site is one of the smartest ways to protect your website while improving and evolving it.
📖 So… What Exactly Is a Staging Site?
In simple terms, a staging site is a clone of your live WordPress website. It looks and functions exactly the same but lives in a hidden area where only you (or your team) can access it.
- 🧪 It’s completely separate from your live site
- 🔒 Not visible to search engines or visitors
- 🛠️ Used for testing updates, plugins, design changes, and more
Once you’re happy with the changes on your staging site, you can “push” them live — without downtime, surprises, or messy errors.
🎯 Why This Matters (Even If You’re Not a Developer)
You don’t need to be a coding expert to use a staging site. Many modern tools make it just a few clicks away. And the benefits are huge:
- 🧯 Avoid crashing your live site with risky updates
- 🔧 Safely test new features or design changes
- 🧼 Redesign your site without scaring away visitors
- 🤝 Collaborate with freelancers or devs without risk
- 🔍 Troubleshoot bugs without going live
Bottom line? A staging site gives you the freedom to experiment, grow, and improve — without gambling with your real website.
✅ Why You Should Use a Staging Site
Still wondering if a staging site is worth the effort? Let’s put it this way: if your website matters to your business, your blog, or your brand — you absolutely need a safe place to test changes before going live.
Here are some key reasons why using a staging site is not just helpful, but essential:
🚧 1. Test Plugin and Theme Updates Safely
Not all plugins play nicely with each other. An update that seems harmless can wreak havoc on your layout, performance, or functionality. With a staging site, you can:
- 🔎 Spot compatibility issues before they go public
- 🧰 Roll back easily if something breaks
- ✅ Test updates without affecting your users
🎨 2. Redesign Without Risk
Want to give your website a fresh coat of paint? Maybe overhaul your homepage or navigation? Do it on your staging site first.
No need to panic over broken CSS, half-baked designs, or layout bugs showing up for your visitors.
👨💻 3. Collaborate with Developers or Freelancers
If you work with a developer, a staging site is a must-have. It allows them to:
- 👷 Work on code or custom features
- 🧪 Test functionality without traffic interference
- 🧼 Keep your production site stable and user-friendly
📉 4. Prevent SEO Disasters
Pushing half-finished pages or buggy functionality to a live site can hurt your reputation — and your rankings. With a staging site, you can:
- 🔒 Keep unfinished content out of Google’s index
- 🔁 Fine-tune performance and user experience
- ✅ Launch only when everything is polished and tested
🧘♀️ 5. Reduce Anxiety (Seriously!)
Knowing that you have a safe space to make and test changes makes a huge difference. It turns website maintenance from a nerve-racking chore into a confident, creative process.
💡 Pro Insight: Many WordPress disasters come from “cowboy coding” — making live edits without a safety net. Staging removes that risk completely.
If your site means anything to you — your business, your readers, your reputation — then a staging site isn’t just a “nice-to-have”… it’s essential.
🛠️ Popular Ways to Create a Staging Site
There are a few different ways to set up a staging site in WordPress — from ultra-simple one-click options to full manual setups for tech-savvy users. The best method depends on your comfort level and the tools you’re using.
Let’s break down the main approaches you can choose from:
💡 Option 1: Hosting Provider with 1-Click Staging
This is by far the easiest and fastest way to create a staging site. Many premium hosting companies (like SiteGround, Bluehost, Kinsta, WP Engine, etc.) offer a built-in staging feature directly from your hosting dashboard.
- ⚡ Super fast — usually one click
- 🔁 Easy to sync between staging and live
- 📦 Often includes automatic backups and versioning
Ideal for: Beginners, businesses, and users with managed WordPress hosting
🔌 Option 2: Staging with a WordPress Plugin
If your host doesn’t offer staging or you prefer to stay inside WordPress, several plugins can do the job beautifully. Popular options include WP STAGING, BlogVault, and Duplicator.
- 🧩 No coding or hosting access required
- 🔒 Most keep your staging site private by default
- 🚀 Good balance between simplicity and control
Ideal for: DIYers, bloggers, small site owners
👨💻 Option 3: Manual Staging Site (Advanced)
This method involves manually copying your WordPress files and database to a subdomain (e.g., staging.yoursite.com), then configuring everything from scratch. It’s more time-consuming but gives you full control.
- 🧠 Best for developers or those comfortable with FTP, databases, and cPanel
- 🔧 Full customization over environment and tools
- 💡 Can be used even without special hosting or plugins
Ideal for: Developers, agencies, or power users
🔍 Quick Comparison Table
| Method | Skill Level | Speed | Best For |
|---|---|---|---|
| Hosting Provider | Beginner | ⚡ Fastest | Managed hosting users |
| Plugin | Beginner–Intermediate | 🚀 Fast | DIY users & small sites |
| Manual | Advanced | ⏳ Slower | Developers & agencies |
No matter which method you choose, the goal is the same: a safe, separate environment to test your changes without putting your live site in danger.
💬 Next up: We’ll walk through each method step-by-step, starting with the easiest — 1-click staging via your hosting provider.
🚀 Option 1: Using Your Hosting Provider (Easiest Method)
If your website is hosted on a quality WordPress-friendly provider, there’s a good chance you have access to 1-click staging feature right from your dashboard. This is by far the simplest and most reliable way to create a staging environment.
Let’s walk through a typical example of how staging works with a modern hosting provider like SiteGround, Bluehost, Kinsta, or WP Engine.
⚙️ Step-by-Step: How to Create a Staging Site from Your Host Dashboard
- Log in to your hosting dashboard.
Navigate to your hosting account panel and find your website under the list of hosted domains. - Locate the “Staging” or “Site Tools” section.
Look for a tab or button labeled something like “Staging,” “Dev Tools,” “Environments,” or “Site Management.” - Create a new staging environment.
Click the “Create Staging Copy” or “Add Staging Environment” button. Some hosts may ask you to name the staging site or select which files to include. - Wait for the setup to complete.
The hosting platform will automatically clone your live site’s files and database. This typically takes 30–90 seconds. - Access your staging site.
You’ll be given a special URL, likestaging.yourdomain.comor a temporary subdomain. Log in with your regular WordPress credentials. - Test away!
Install new plugins, test theme changes, update WordPress — all without touching your live site.
🔄 Pushing Changes from Staging to Live
Once you’re happy with your updates, most hosting platforms allow you to “push” your changes live with one click.
- Some hosts let you choose what to push (files only, database only, or both)
- Backups are usually created automatically before pushing
- You may be able to schedule or preview changes before going live
✅ Pro Tip: Always review and test everything thoroughly before pushing changes to your live site — and double-check that your staging site isn’t indexed by Google (you don’t want duplicate content problems!).
🎯 Why This Method Rocks
- 🖱️ Literally just a few clicks
- 🔁 Full sync between live and staging
- 🛡️ Automatically backed up and secured
- 💻 No coding or technical steps required
If your hosting provider includes this feature, use it. It’s fast, safe, and designed to make your workflow smoother.
🔌 Using a Plugin to Create a WordPress Staging Site (Great for Beginners)
If your hosting provider doesn’t offer built-in staging, or you just prefer staying inside your WordPress dashboard, plugins are the next best (and easiest) solution.
One of the most popular and beginner-friendly options is WP STAGING — a free plugin that lets you clone your live site into a private staging environment in just a few clicks.
🛠️ How to Create a Staging Site with WP STAGING
- Install the Plugin:
- Go to Plugins → Add New in your WordPress dashboard.
- Search for WP STAGING.
- Click Install → Activate.
- Create Your Staging Site:
- Navigate to WP STAGING → Create New Staging Site.
- Give your staging site a name (e.g.,
staging). - Click Start Cloning.
This process may take a few minutes depending on your site’s size.
- Access the Staging Site:
- Once done, you’ll see a link to access your staging site (e.g.,
yoursite.com/staging). - Login with your usual WordPress credentials.
- Once done, you’ll see a link to access your staging site (e.g.,
🔒 A Few Things to Know
- 🟠 The free version of WP STAGING is for cloning only. To push changes back to live, you’ll need the Pro version.
- 🧪 Everything you do on staging stays private and won’t affect your real site — unless you manually copy it back.
- 🚫 WP STAGING automatically prevents search engines from indexing your staging site.
🌟 Pros of Using WP STAGING
- ✅ No hosting access or coding required
- ✅ Quick to set up — just a few clicks
- ✅ Great for solo bloggers, small businesses, and non-tech users
👎 Limitations
- 🔄 No “push to live” unless you upgrade
- 📁 Can increase your site size with duplicate data
- ⚙️ Limited customization compared to manual staging
Still, for most WordPress users, especially beginners, a plugin like WP STAGING is the fastest, safest, and easiest way to experiment with updates, test changes, and fix issues — all without fear.
💡 Pro Tip: After testing on staging, manually replicate changes on your live site — or consider upgrading if pushing is essential to your workflow.
👨💻 Manual Staging Setup (Advanced Method)
If you’re the hands-on type or working with a host that doesn’t support 1-click staging, you can still create a fully functional staging site — manually. It takes a bit more work, but it gives you total control over every aspect of the process.
💡 Note: This method requires familiarity with FTP, cPanel, phpMyAdmin, and WordPress config files. If that sounds scary, consider using a plugin instead.
🧩 Step 1: Set Up a Subdomain or Subdirectory
Create a separate space on your server for the staging site. You can use:
staging.yourdomain.com(recommended — cleaner and more isolated)yourdomain.com/staging
This is done through your hosting dashboard or cPanel.
📁 Step 2: Copy Website Files to the New Location
Using FTP (or File Manager in cPanel), copy all your WordPress files from the root directory of your live site into the new subdomain or subdirectory folder.
🗃️ Step 3: Export and Import Your Database
- Log into phpMyAdmin on your host
- Export the live database (SQL file)
- Create a new database for staging
- Import the SQL file into the new staging database
⚙️ Step 4: Update the wp-config.php File
In your staging folder, open wp-config.php and change the database details:
define( 'DB_NAME', 'your_staging_db_name' );
define( 'DB_USER', 'your_staging_db_user' );
define( 'DB_PASSWORD', 'your_staging_db_password' );
Also update the site URLs in the database if needed (you can do this via phpMyAdmin or with a search/replace tool like WP-CLI or a plugin temporarily).
🚫 Step 5: Prevent Search Engines from Indexing
You don’t want your staging site to be crawled by Google. Here are two ways to prevent it:
- Add
Disallow: /to yourrobots.txt - Go to Settings → Reading in WP admin and check “Discourage search engines from indexing this site”
🔐 Step 6: (Optional but Smart) Password Protect the Site
For extra safety, add basic authentication to your staging subdomain using .htaccess and .htpasswd — or enable it via your host’s control panel.
🔐 Pro Tip: This prevents casual visitors — or bots — from accidentally discovering your staging environment.
📦 Summary: Is Manual Staging Right for You?
If you’re comfortable with file transfers, database manipulation, and server tools, manual staging gives you unparalleled flexibility. It’s especially useful for developers, agencies, and custom WordPress setups.
But if that felt like a lot… plugins or hosting tools are definitely your friend. 😉
🧠 Best Practices for Working with a Staging Site
Having a staging site is a huge advantage — but only if you use it the right way. To ensure your workflow is smooth, safe, and effective, here are some battle-tested tips and best practices to keep in mind when working in a staging environment.
🔒 1. Keep Your Staging Site Private
By default, staging sites shouldn’t be visible to the public or indexed by search engines. Use one or more of the following methods to secure it:
- 🔐 Password-protect the entire site or directory
- 🚫 Add
noindex, nofollowmeta tags - 🧱 Use plugins like Maintenance Mode or Coming Soon
Why? You don’t want Google indexing a half-built site or duplicate content.
📋 2. Mirror Your Live Site Closely
For staging to be effective, it should be as similar to your live site as possible:
- 📦 Same theme, plugins, and settings
- 🗂️ Identical content and database structure
- ⚙️ Matching PHP and server configurations
The more accurate the clone, the more accurate your testing results will be.
🔁 3. Use Version Control for Larger Projects
If you’re developing custom code or working in a team, consider integrating Git or another version control system. This gives you a clear history of changes and allows easy rollbacks.
📦 4. Backup Before You Push to Live
Even though you’ve tested your changes, never push staging updates live without creating a backup first. Hosting providers or plugins like UpdraftPlus make this simple.
💡 Always create a restore point — just in case the merge doesn’t go as planned.
✅ 5. Test Everything — Not Just What You Changed
Sometimes, a small update in one area causes issues elsewhere. Always do a full test sweep before pushing live:
- 🧪 Test core pages (home, blog, contact, shop, etc.)
- 🛒 Test any transactional flows (checkout, form submissions)
- 📱 Test across devices and screen sizes
👥 6. Communicate Clearly With Your Team
If you’re working with a developer, designer, or client, document changes and share clear notes or screenshots. Use collaboration tools or staging plugins that support comments and staging links.
🧹 7. Delete Old or Unused Staging Sites
Once you’re done testing and have pushed changes live, clean up your old staging environment. This keeps your hosting space tidy, reduces confusion, and removes potential security risks.
Following these best practices helps ensure your staging site does what it’s meant to: protect your live site while giving you the freedom to innovate and test confidently.
🚀 How to Push Your Staging Site Live
You’ve tested your changes, fixed any issues, and polished everything until it’s just right. Now it’s time for the big moment: pushing your staging site live.
This step replaces your live site with the updated version from staging — so it’s important to do it carefully and correctly.
🔁 Common Methods for Going Live
How you “go live” depends on the method you used to create your staging site. Here’s how it works in each case:
☁️ 1. Hosting Provider with 1-Click Push
If you’re using a managed host with built-in staging (like SiteGround, WP Engine, Kinsta, etc.), you’ll typically find a “Push to Live” or “Deploy” button in your hosting dashboard.
- 💡 Many hosts let you choose what to push: entire site, just files, or just the database
- 🧠 Be mindful — pushing the full staging site will overwrite your live database and content
- ✅ Backup your live site first (most hosts do this automatically)
🔌 2. Plugin-Based Staging (e.g., WP STAGING, BlogVault)
Plugins like WP STAGING Pro offer a one-click “Push Changes to Live Site” feature. These tools often let you choose between:
- Full push (database + files)
- Selective push (only theme/plugin files or media)
Plugins are especially handy if your host doesn’t support staging or you need more granular control.
🧱 3. Manual Push (Advanced)
With a manual setup, you’ll need to copy your files and database from staging to live yourself. This involves:
- Exporting the staging database
- Uploading all files via FTP
- Updating
wp-config.phpand database URLs (using a tool like WP Migrate DB or Search Replace DB)
⚠️ Warning: This method gives you full control — but also full responsibility. Mistakes can lead to broken sites, so always test and back up!
🧯 Safety Checklist Before Going Live
- ✅ Double-check functionality: Menus, forms, buttons, and responsiveness
- ✅ Review SEO settings: Make sure staging noindex/nofollow isn’t transferred
- ✅ Backup live site: Always create a restore point
- ✅ Notify your team or stakeholders: Schedule the push during off-peak hours
🧠 Pro Tip: After pushing live, clear your site and browser cache to ensure you’re seeing the most up-to-date version — and ask others to double-check too.
🎉 You Did It!
Once you’ve gone live, celebrate a bit — you just took a big step in maintaining a safer, smarter workflow for your WordPress site. No more cowboy edits, no more live-site surprises.
👏 Bravo!